
Build a Connected Company Project
Connect one fictional project to a coordinator, supplier, quote, preparation note and review date.
Use the same practice collection throughout. Our fictional example is Cedar Office Refresh (COR-01). The coordinator is Maya Reed and the supplier is Northbank Interiors.
You can practise this company workflow in Personal context. It does not create a shared Company or Project area. The screens demonstrate record relationships; access to real shared information must be reviewed separately.
Start with Create Your First Record if you have not made the preparation Note. Work through the chapters in order, or use the chapter list beneath the film to return to a particular connection.
The sample supplier quote is an invented training document. It is not a commercial offer, invoice or recommendation. No email, notification or invitation is needed to follow this exercise.
Read One Company Project, Connected Information for the reasoning behind the example and Where Is My Information Saved, and Who Can See It? before using a shared collection.
All people, companies, dates, documents and project details in this example are fictional. Any resemblance to real people or organizations is coincidental.
Build a Connected Company Project
Guided walkthrough using actual online screenshots with click and result highlights. Each screen is held for reading; this is a paced screen presentation. All people, companies, dates and documents are fictional examples. Any resemblance to real people or organizations is coincidental.
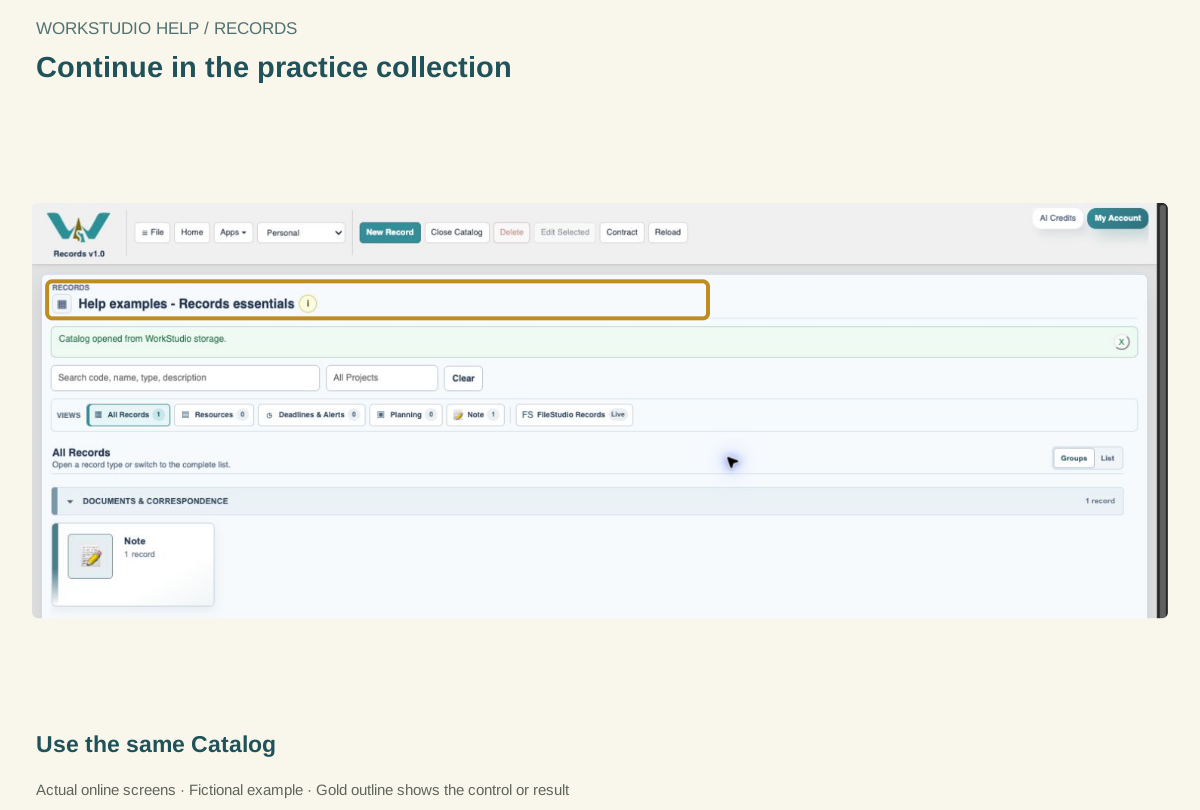
Continue in the practice collection
Start with the preparation Note from the first tutorial. Keep these examples in one collection so the connections are easy to inspect.
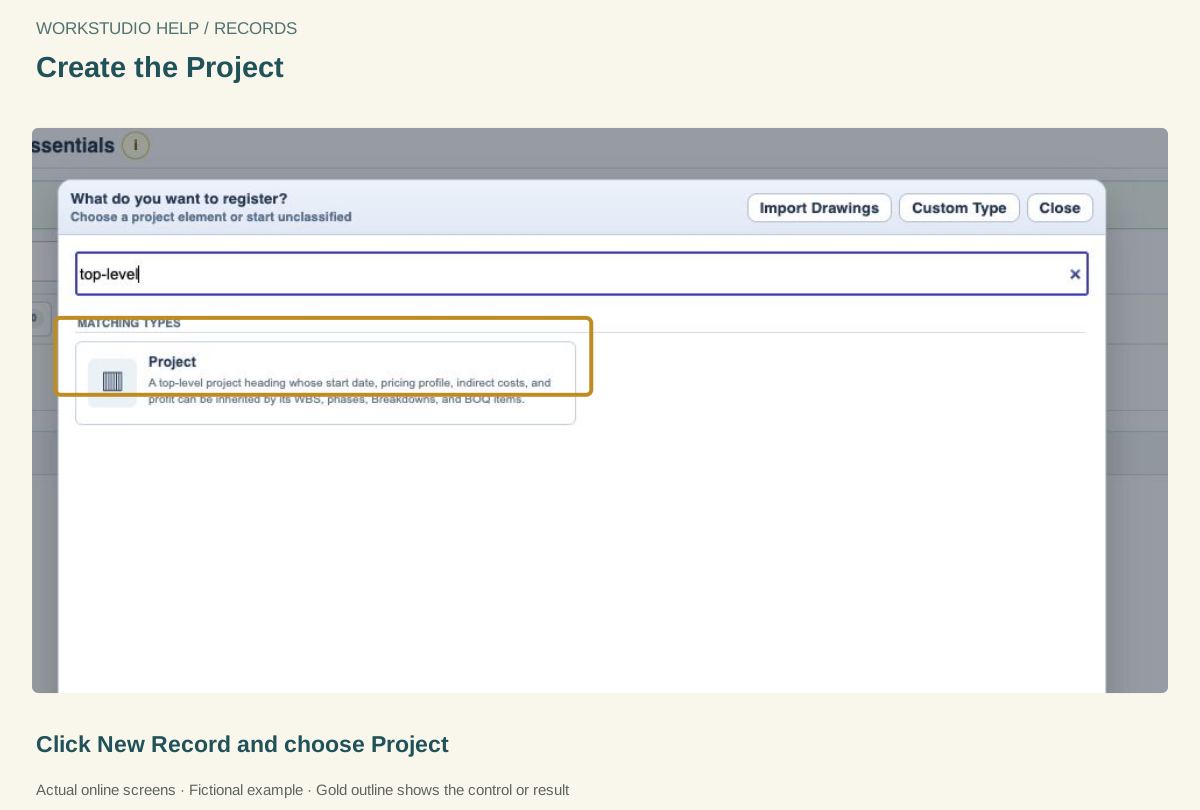
Create the Project
Search for Project. Choose Create New, enter Cedar Office Refresh and COR-01, then click Next.
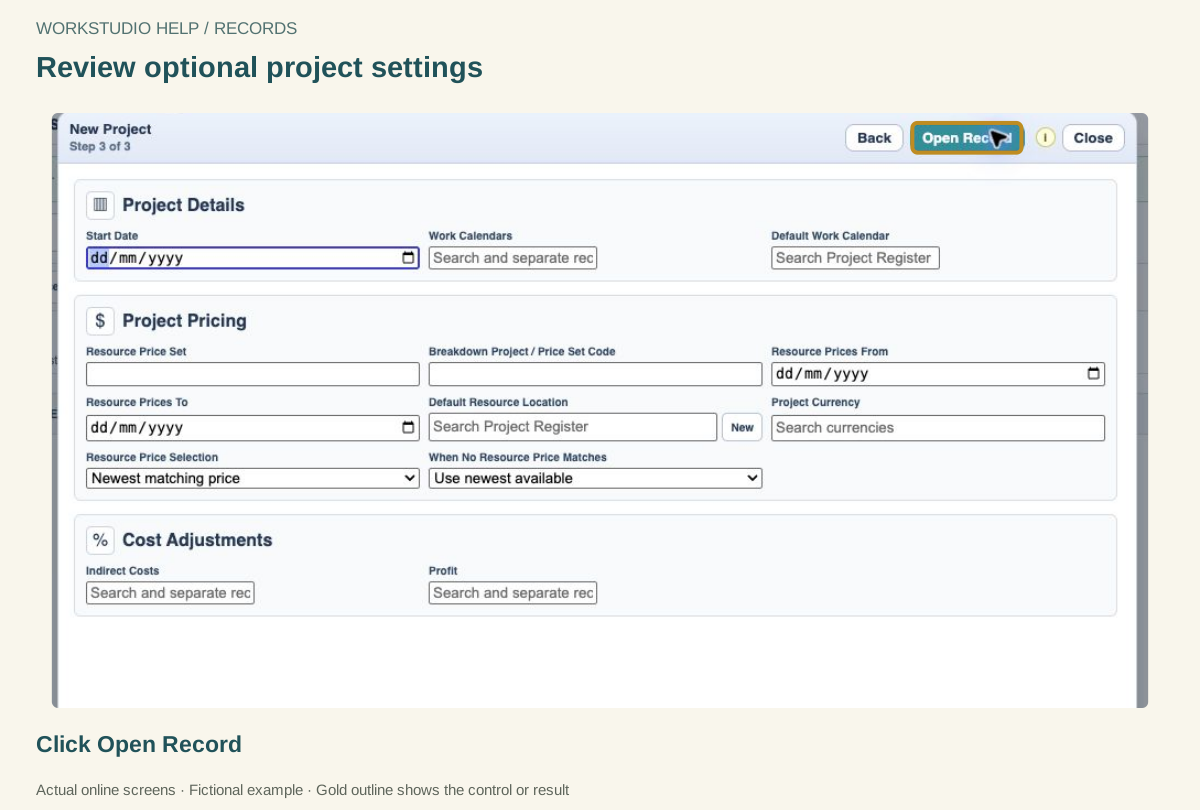
Review optional project settings
The next screen offers dates and pricing settings. Leave unknown values empty. This example teaches connections; costing has its own guides.
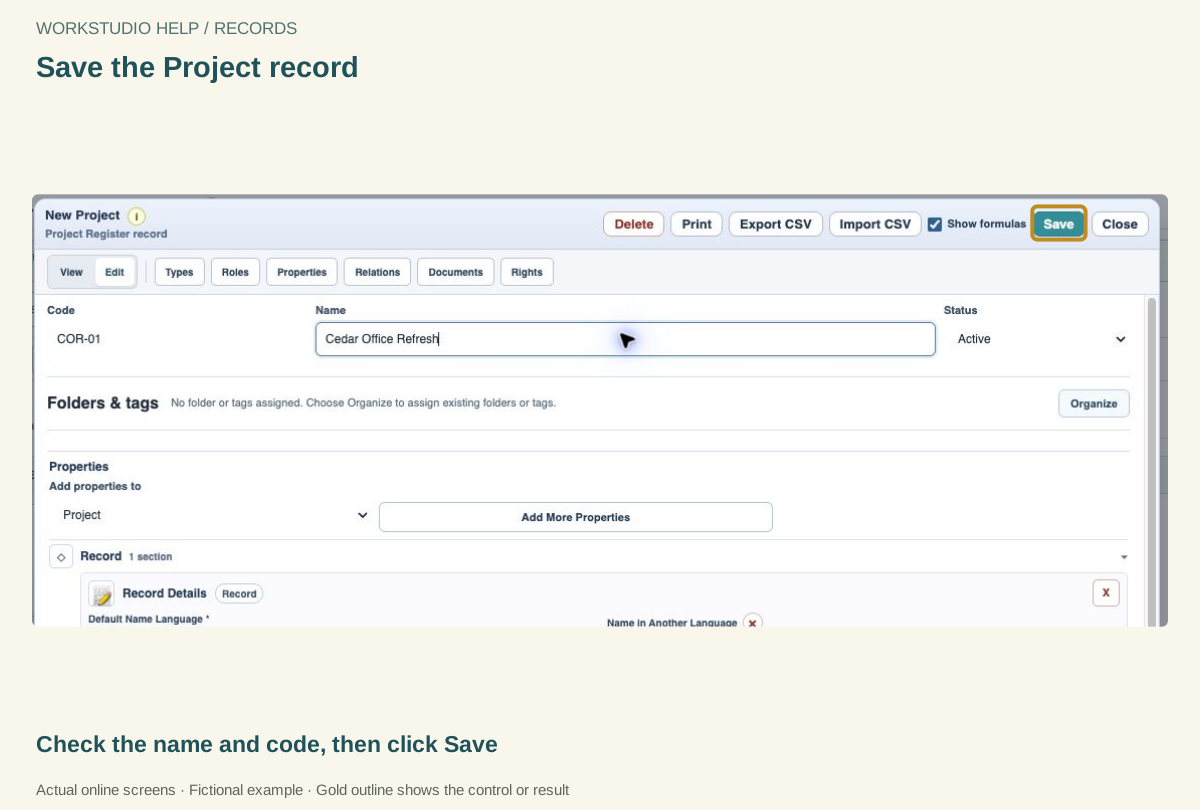
Save the Project record
The editor holds the project identity and properties. A Project record does not create a shared workspace or invite people.
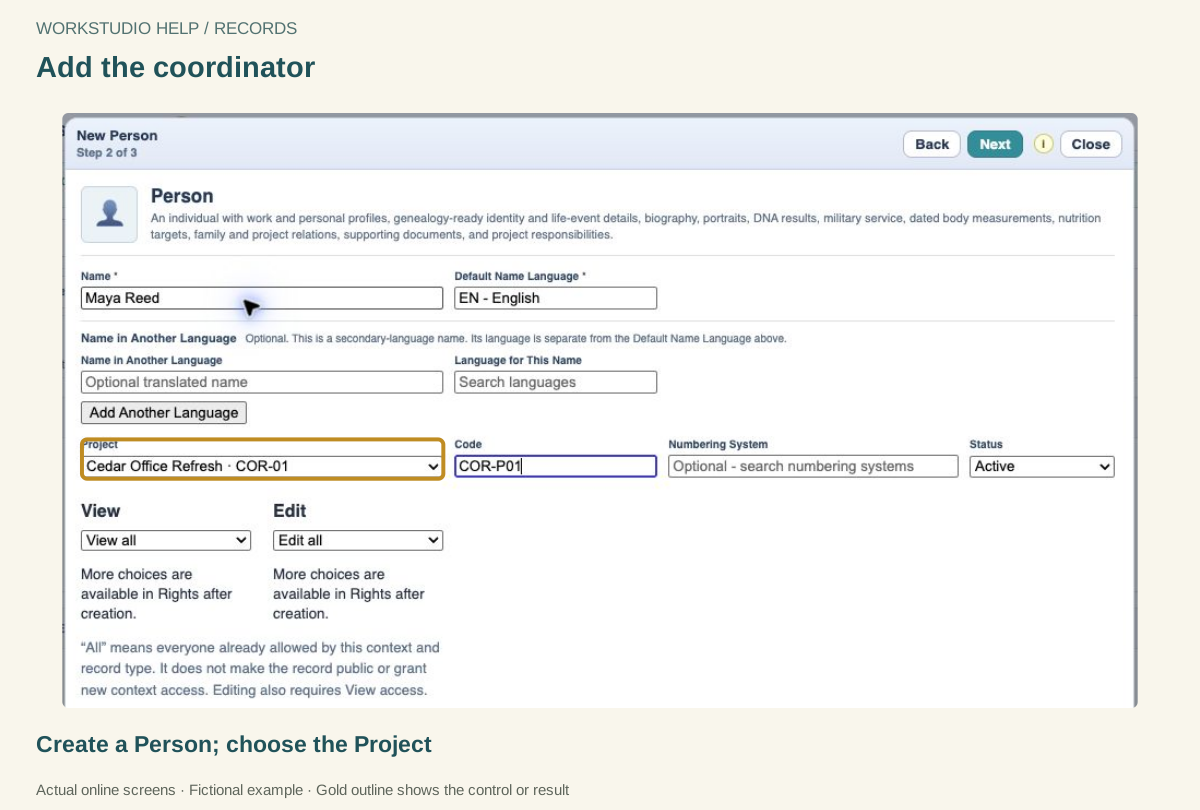
Add the coordinator
Create Maya Reed with code COR-P01. Select Cedar Office Refresh in Project so this Person belongs to the same project view.
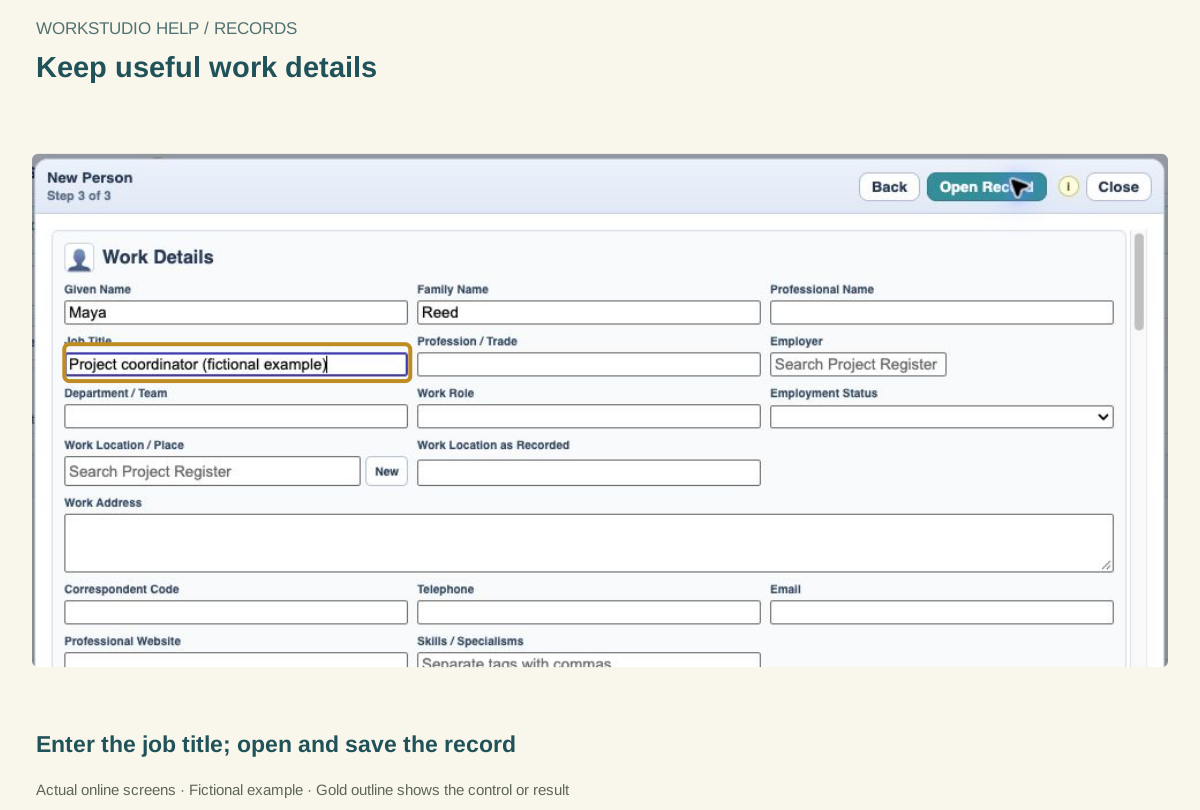
Keep useful work details
Enter Maya and Reed in the name fields and Project coordinator in Job Title. Unneeded personal fields can stay empty.
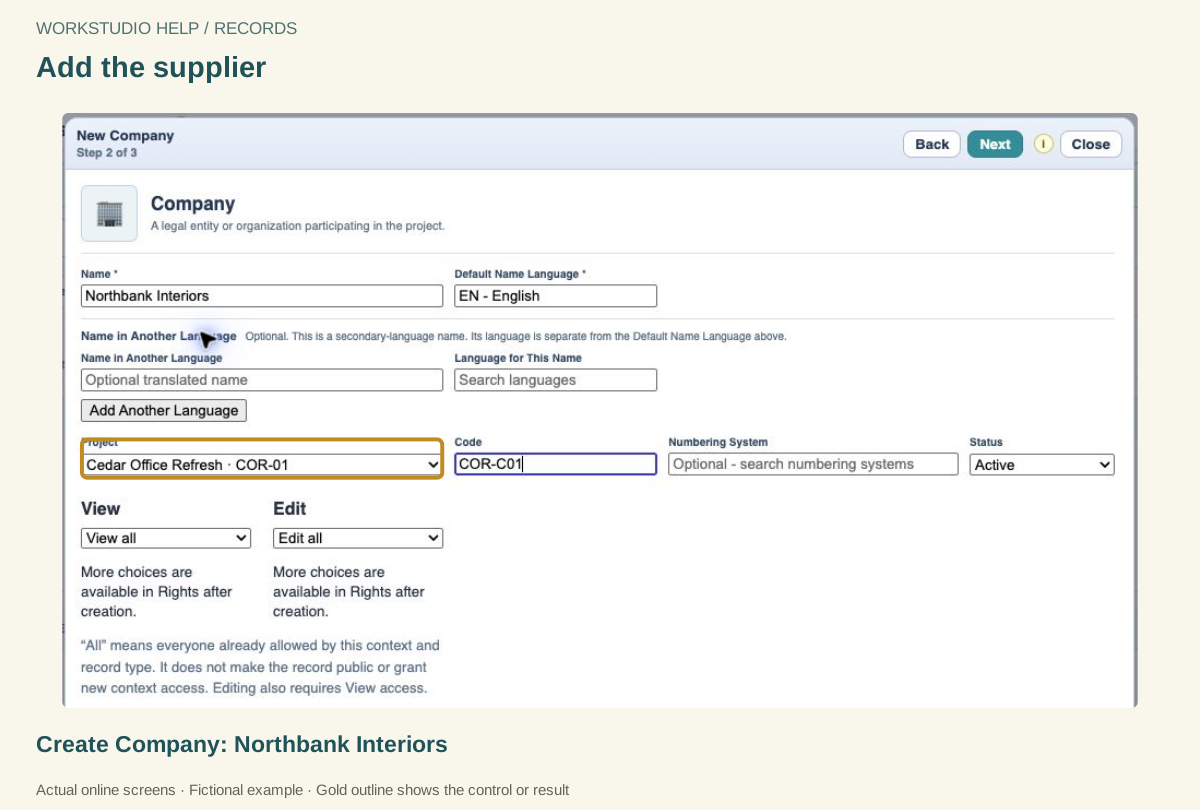
Add the supplier
Use code COR-C01 and select Cedar Office Refresh. In the next screen, enter its fictional legal name; open the record.
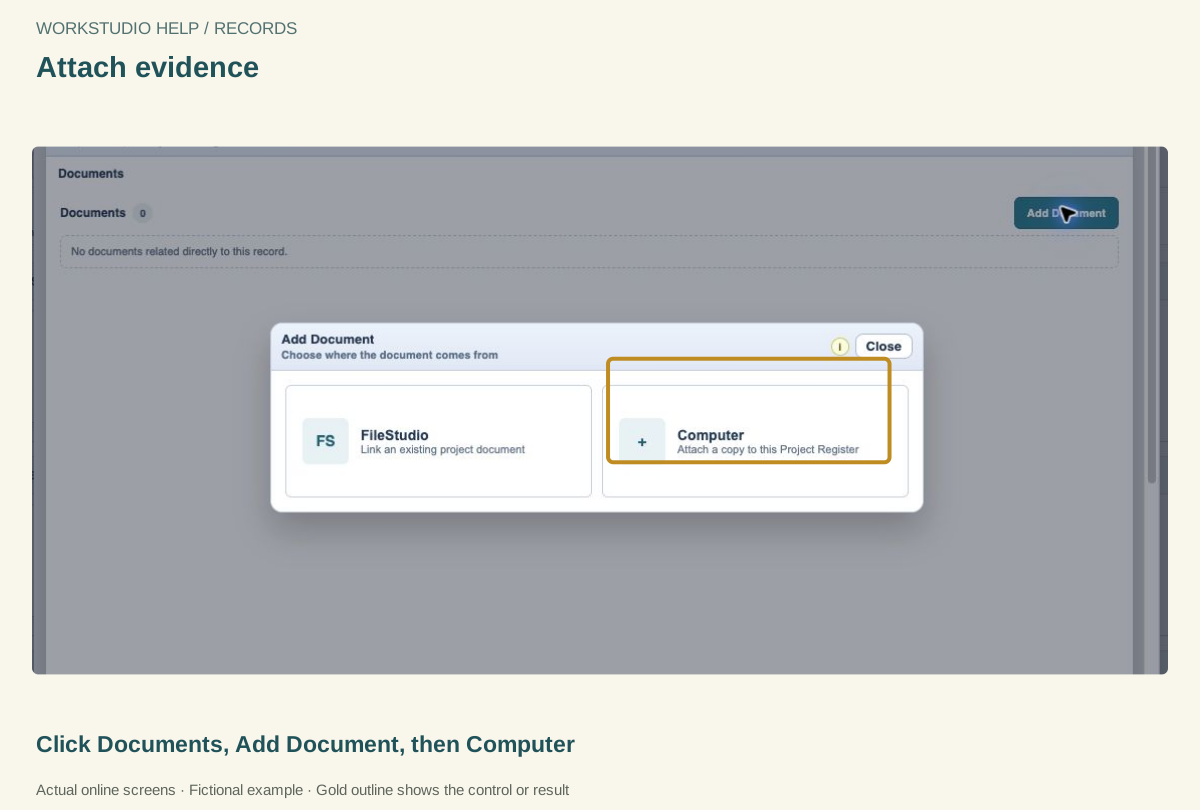
Attach evidence
From the Company editor, choose Documents and Add Document. Computer attaches a copy; FileStudio links an existing project document.
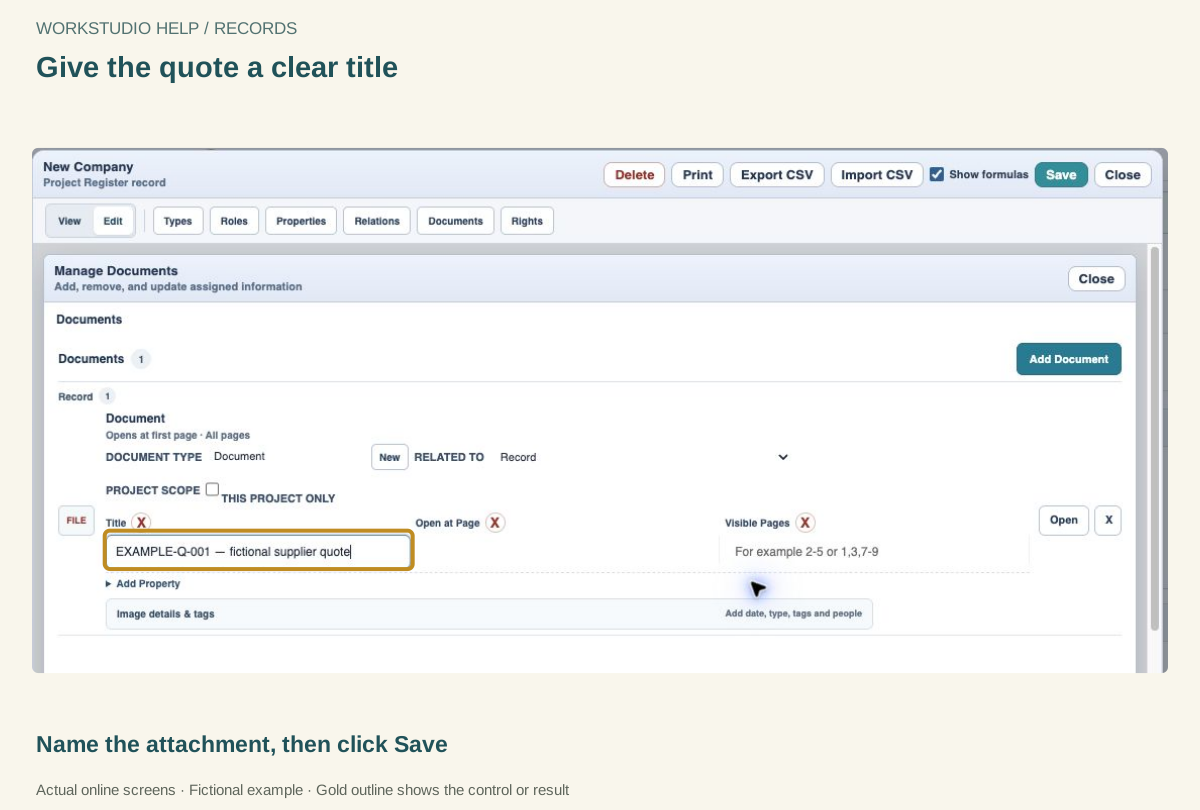
Give the quote a clear title
Choose your fictional quote file. Label it EXAMPLE-Q-001 — fictional supplier quote. Save the Company record.
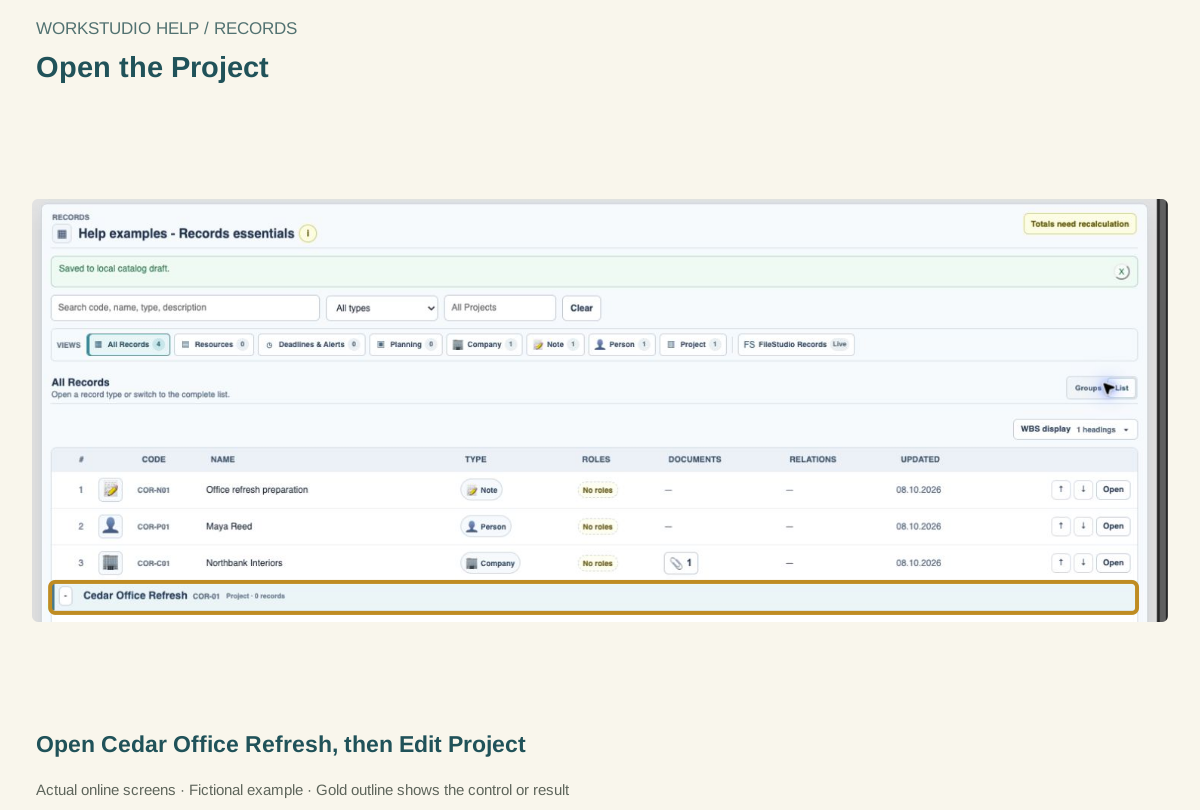
Open the Project
In All Records → List, open the Project heading. Use Edit Project to reach its record tools.
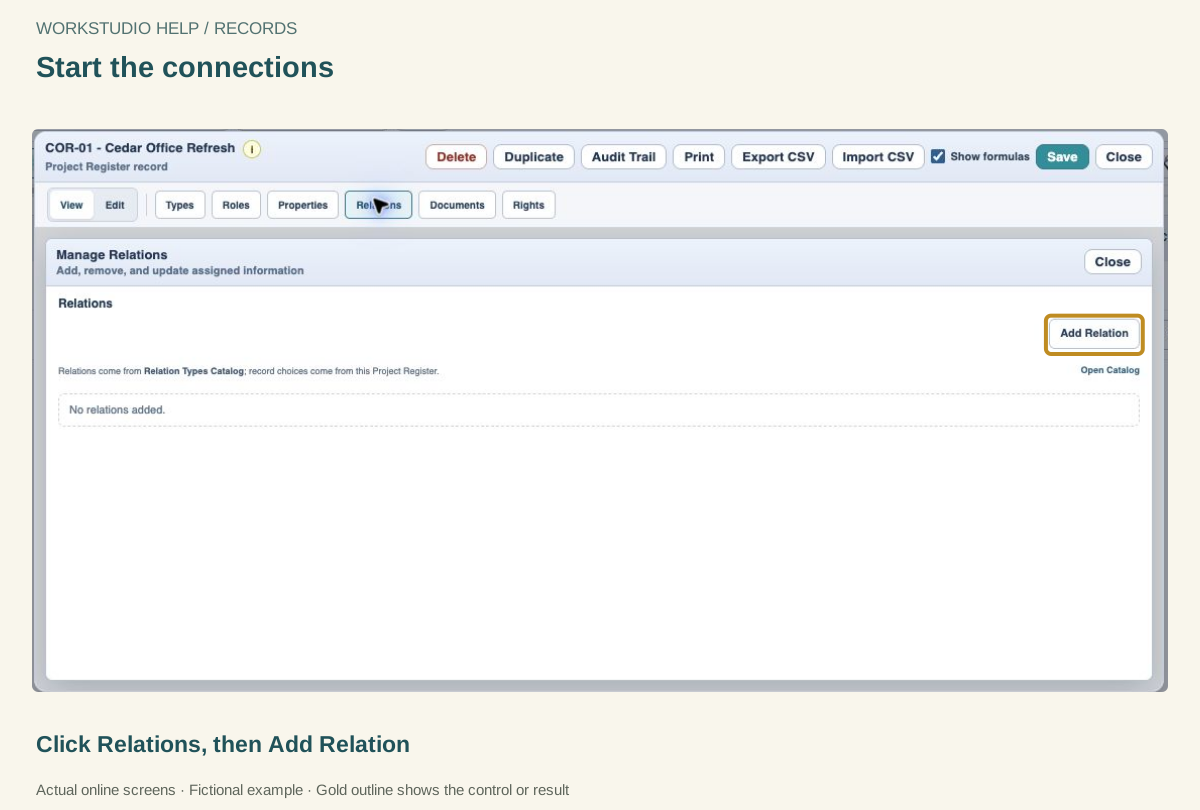
Start the connections
The Project already exists. Add relationships to existing records instead of creating duplicate people or companies.
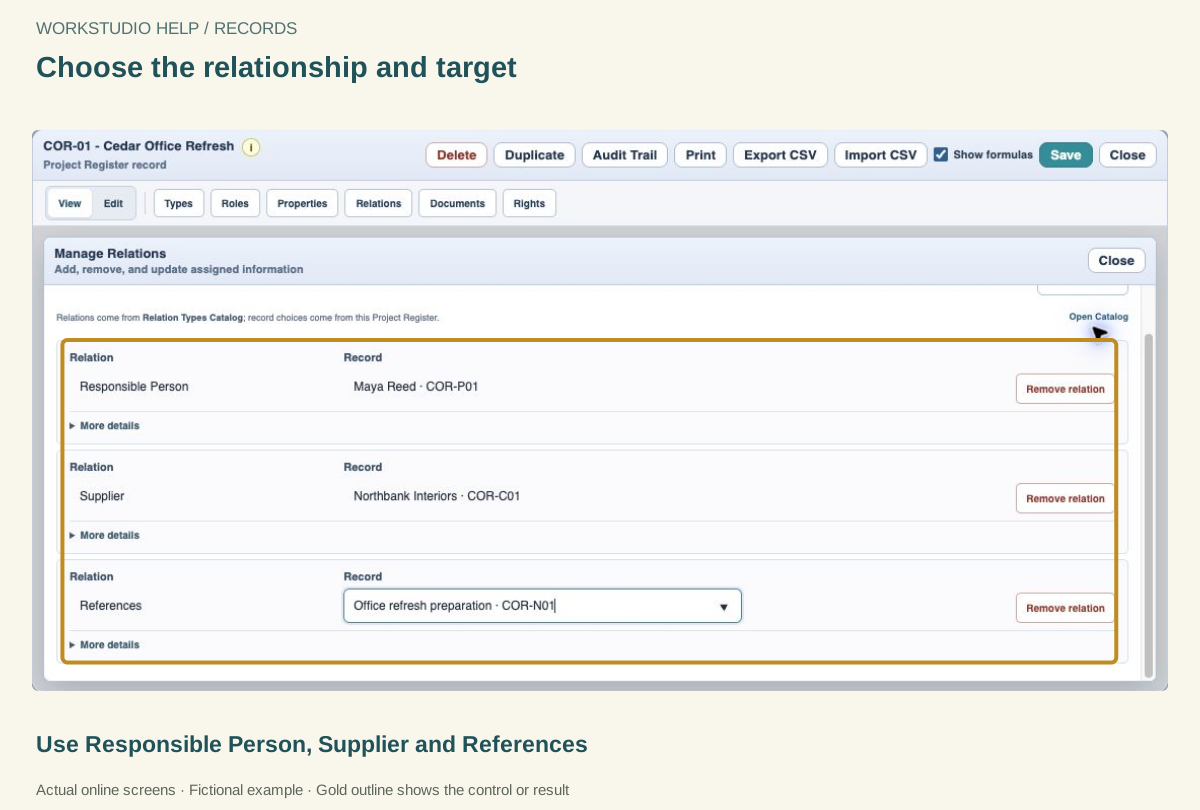
Choose the relationship and target
Connect Maya Reed as Responsible Person, Northbank Interiors as Supplier, and the preparation Note with References. Save the Project.
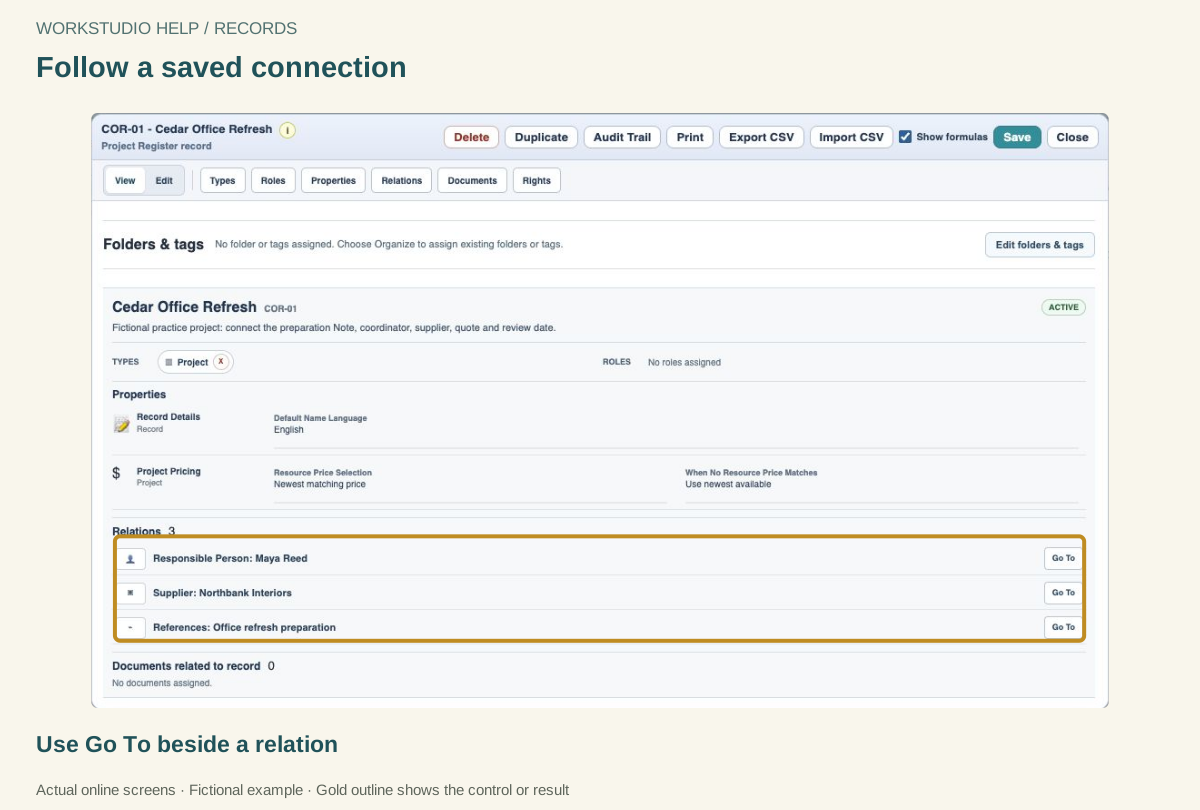
Follow a saved connection
The Project now lists all three links. Go To opens the related record; it does not grant that person access or send a notification.
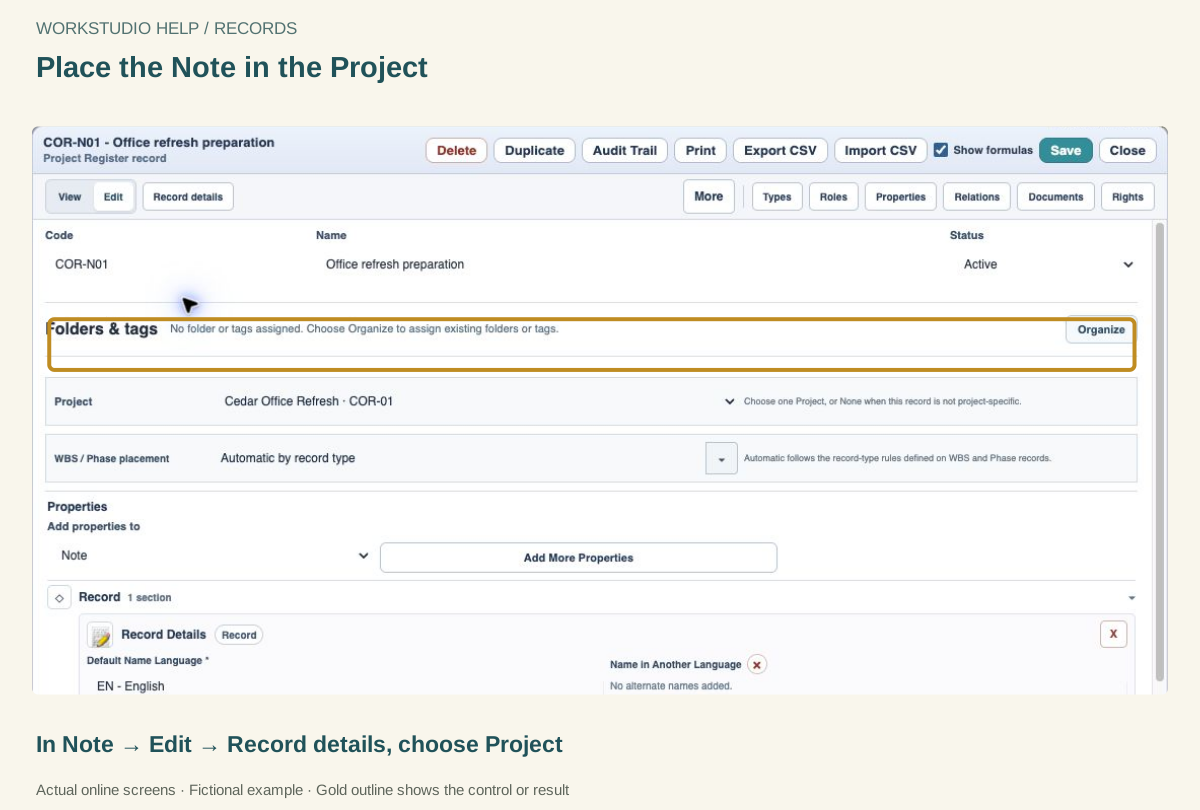
Place the Note in the Project
Select Cedar Office Refresh, then Save. Project assignment groups the Note; the References relation explains its connection.
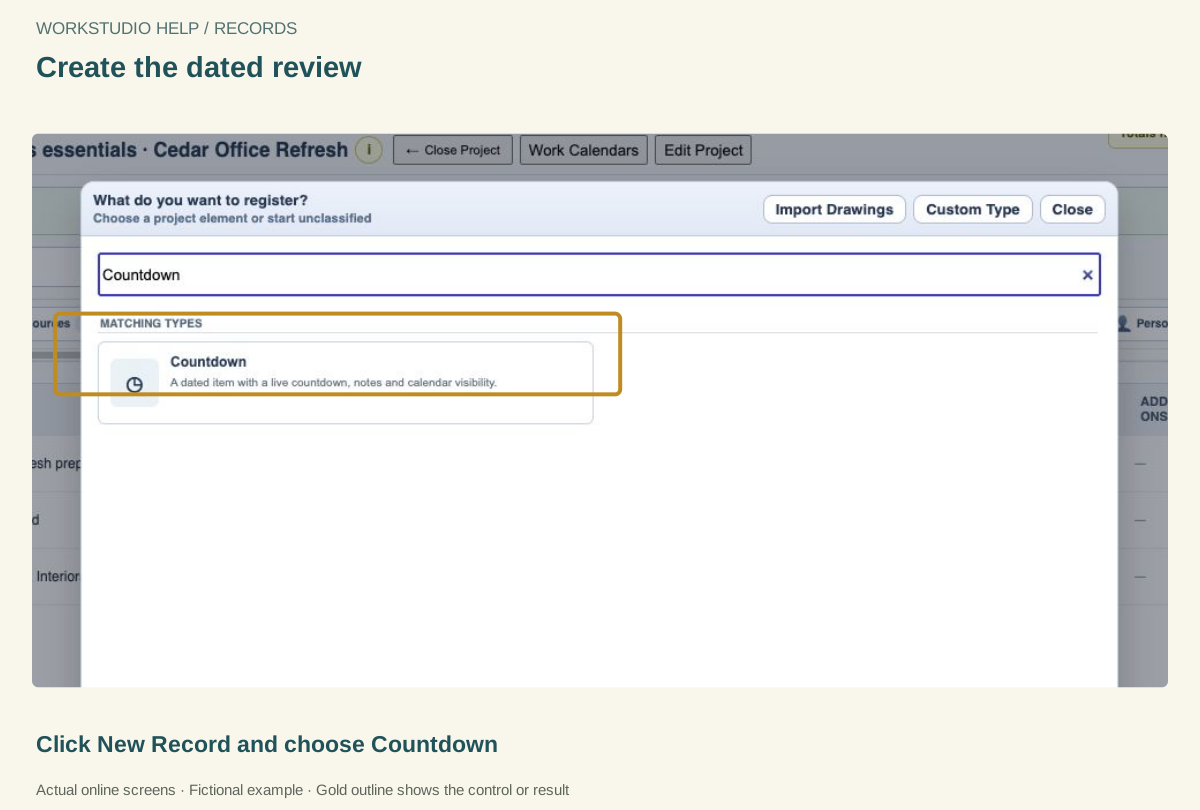
Create the dated review
Create one event called Review the office refresh plan. Its date will be visible in Calendar and Countdown.
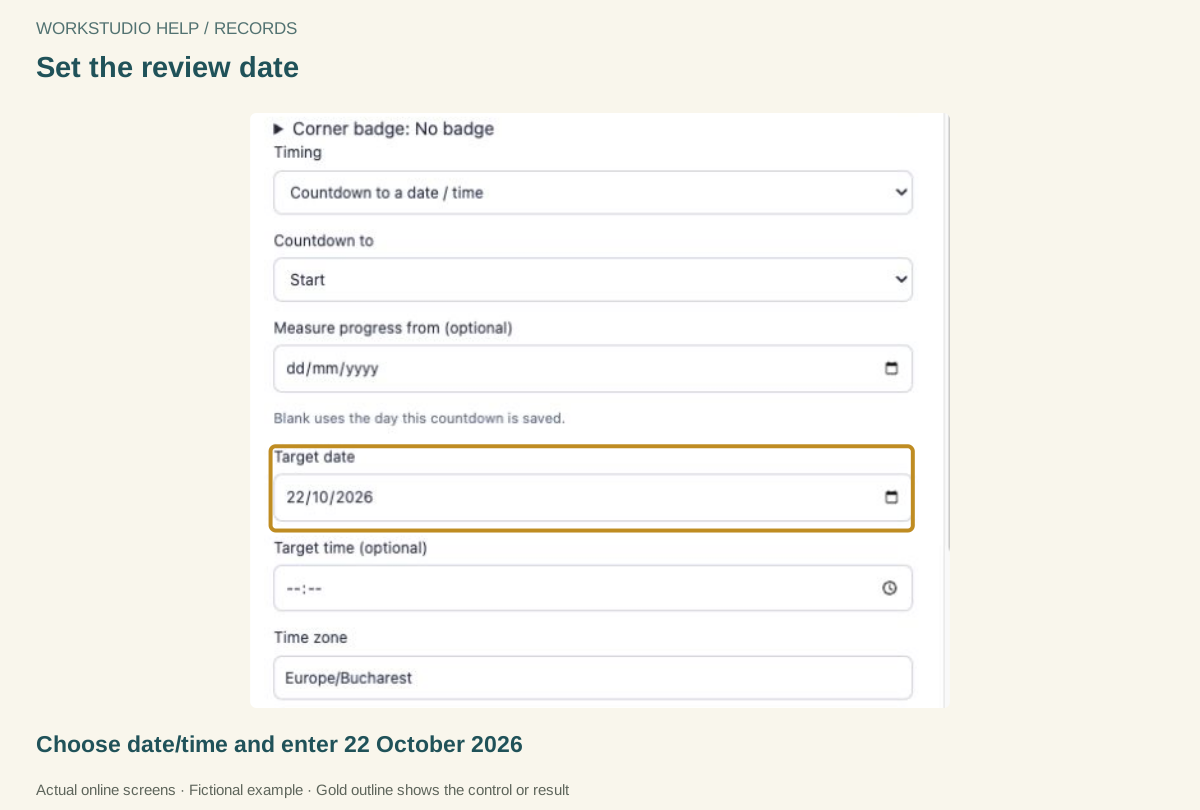
Set the review date
Select Countdown to a date / time. Set the target date and check the time zone. The date and project details are fictional.
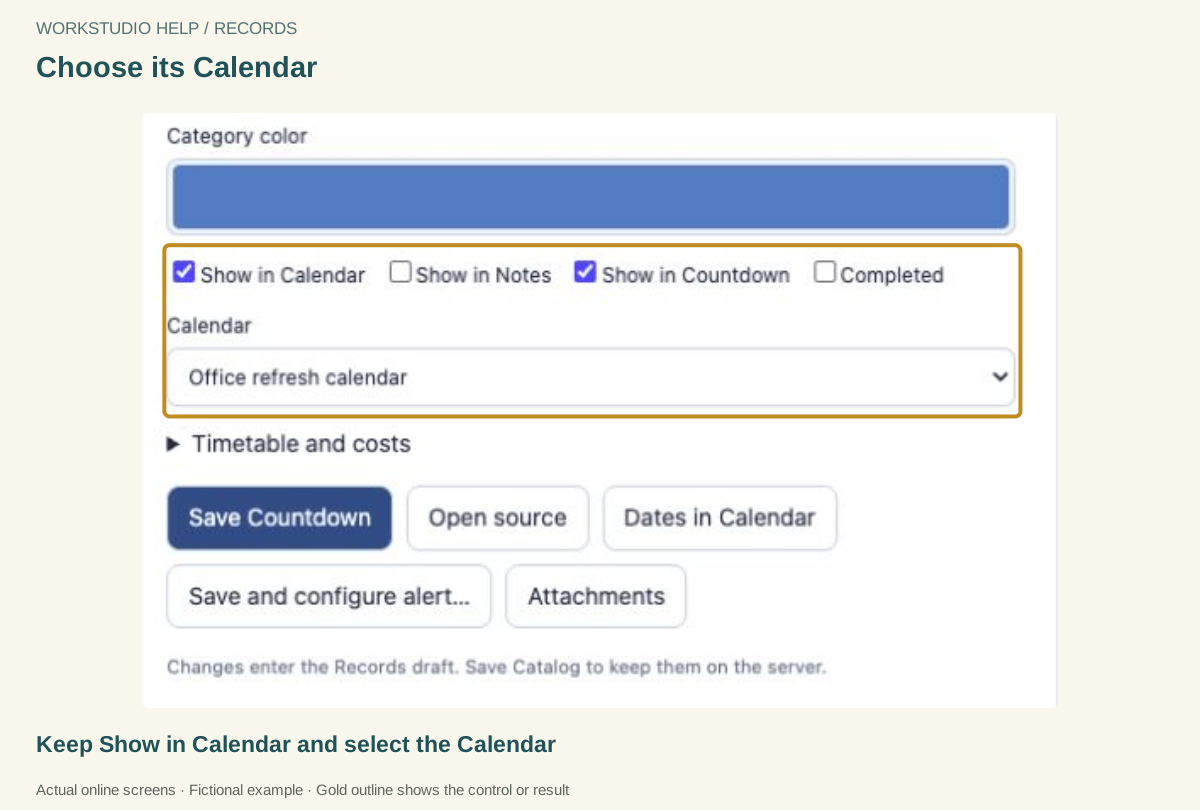
Choose its Calendar
Use Create a new calendar and name it Office refresh calendar, or select it if it exists. Click Save Countdown. No alert is needed.
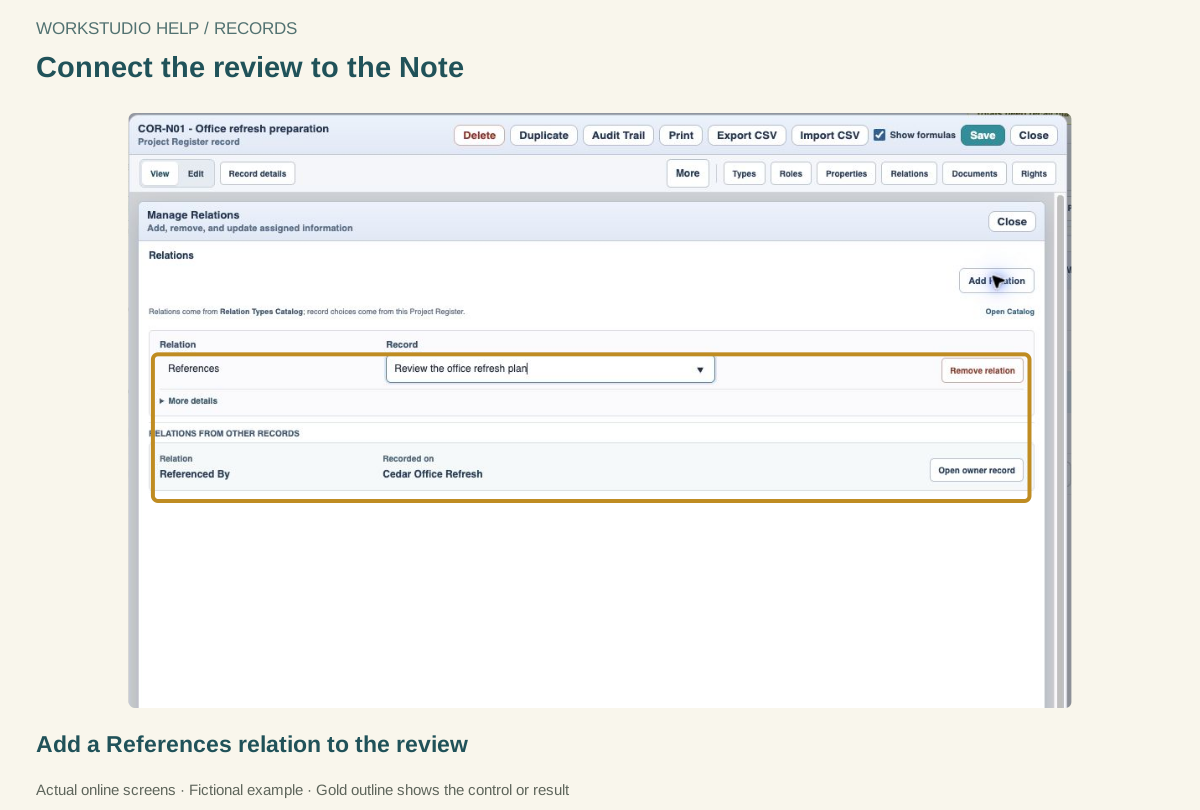
Connect the review to the Note
In the Note, open Record details → Relations → Add Relation. Choose References and the existing review event. Save the Note.
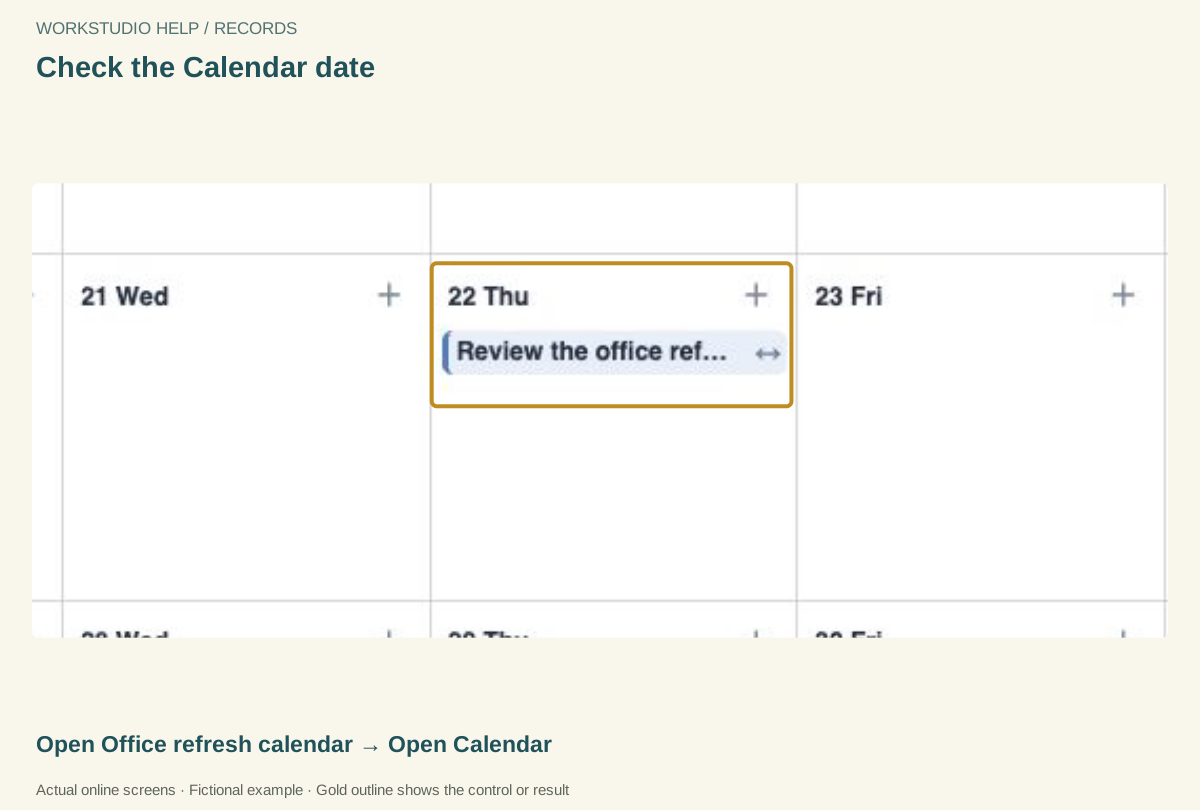
Check the Calendar date
The review appears on 22 October. This is the source event you just created, shown on a calendar.
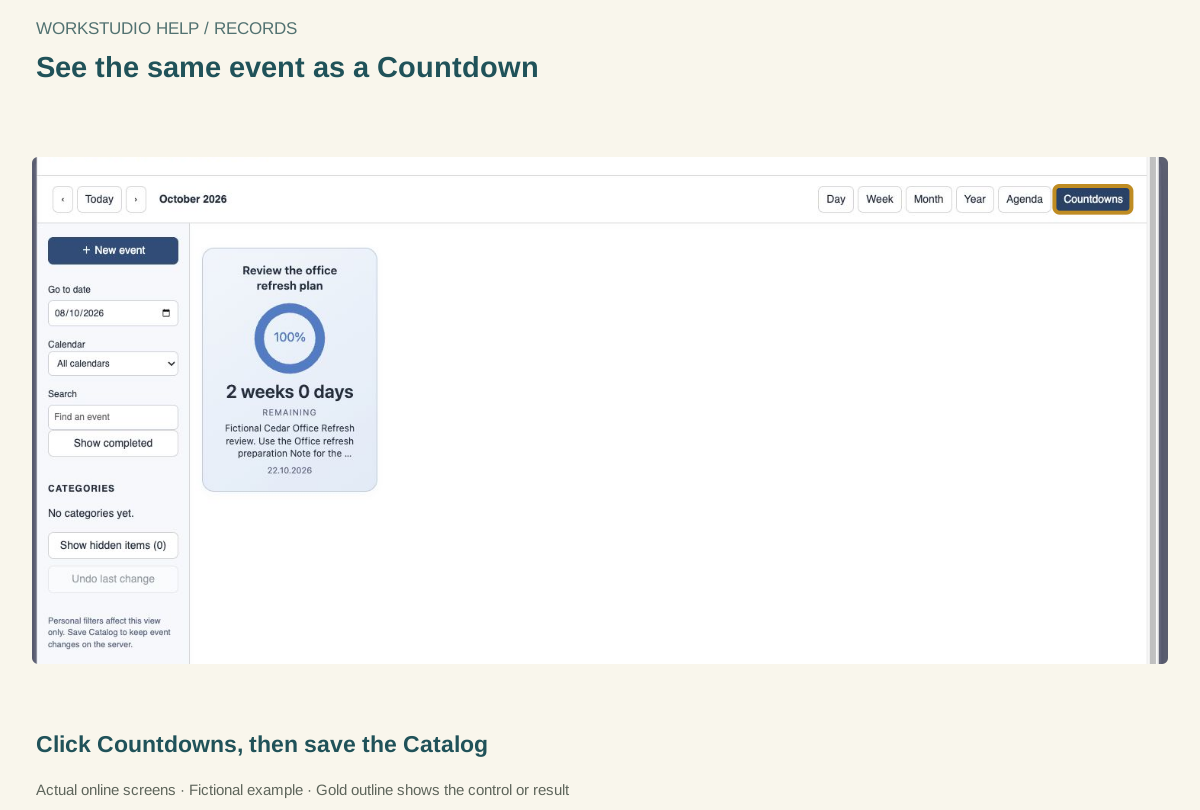
See the same event as a Countdown
The card uses that same review date. Close Calendar and choose File → Save Catalog. Wait for the saved-to-server confirmation.
Enable JavaScript to use reading progress and usefulness ratings.