
Create an event and review your week
Follow the marked screenshots, or watch the online walkthrough at your own pace.
Where: WorkStudio online → Records. Use a saved example Catalog; our screenshots show Help examples - Planning.
The gold outline marks the control or result to look at. Read the instruction, make the change, then continue. Dates are fictional and will differ from your own.
Create an event and review your week
Guided screen walkthrough using real online screens and click highlights. Screens are held for reading; this is not a continuous recording. All names, dates and tasks are fictional examples. Any resemblance to real people or events is coincidental.
Create a named Calendar
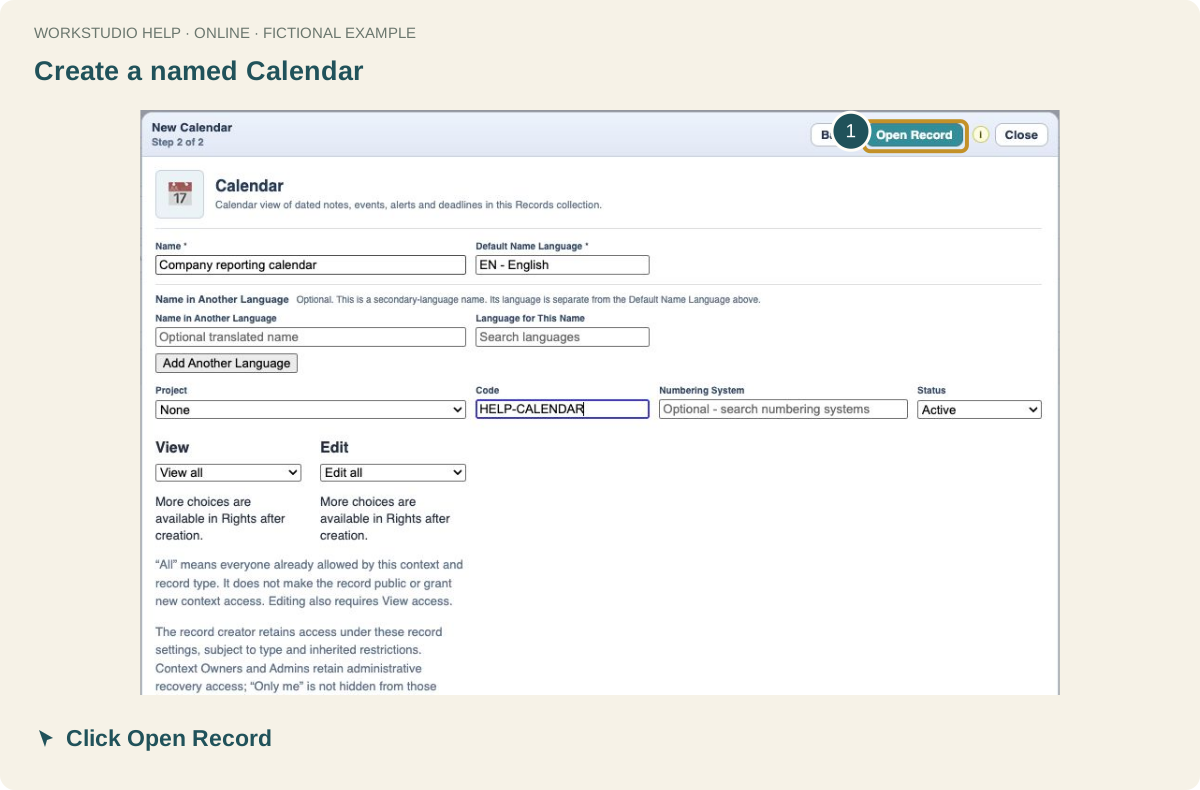
Click New Record → Calendar → Create New. Name it Company reporting calendar, click Open Record and Save. Open the saved record to enter Calendar.
Add an event
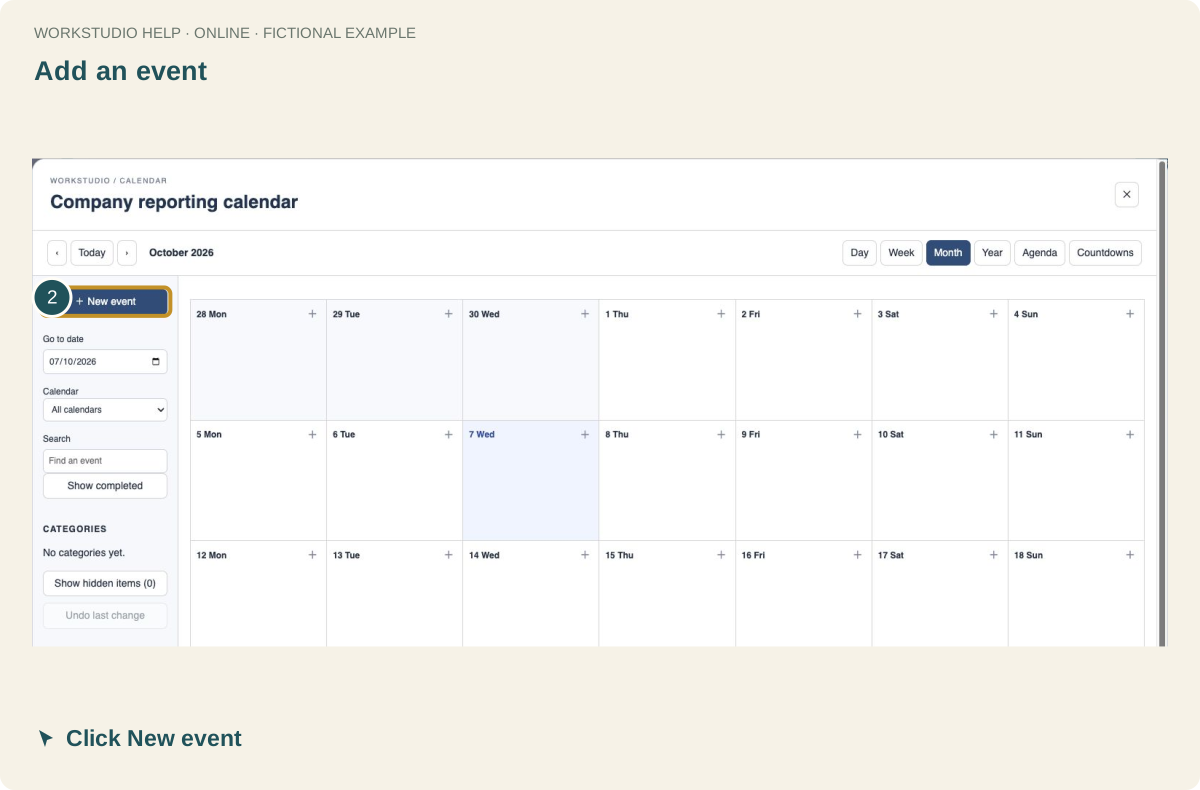
Click New event. You can also use the plus button on a specific day.
Set the event’s date and category
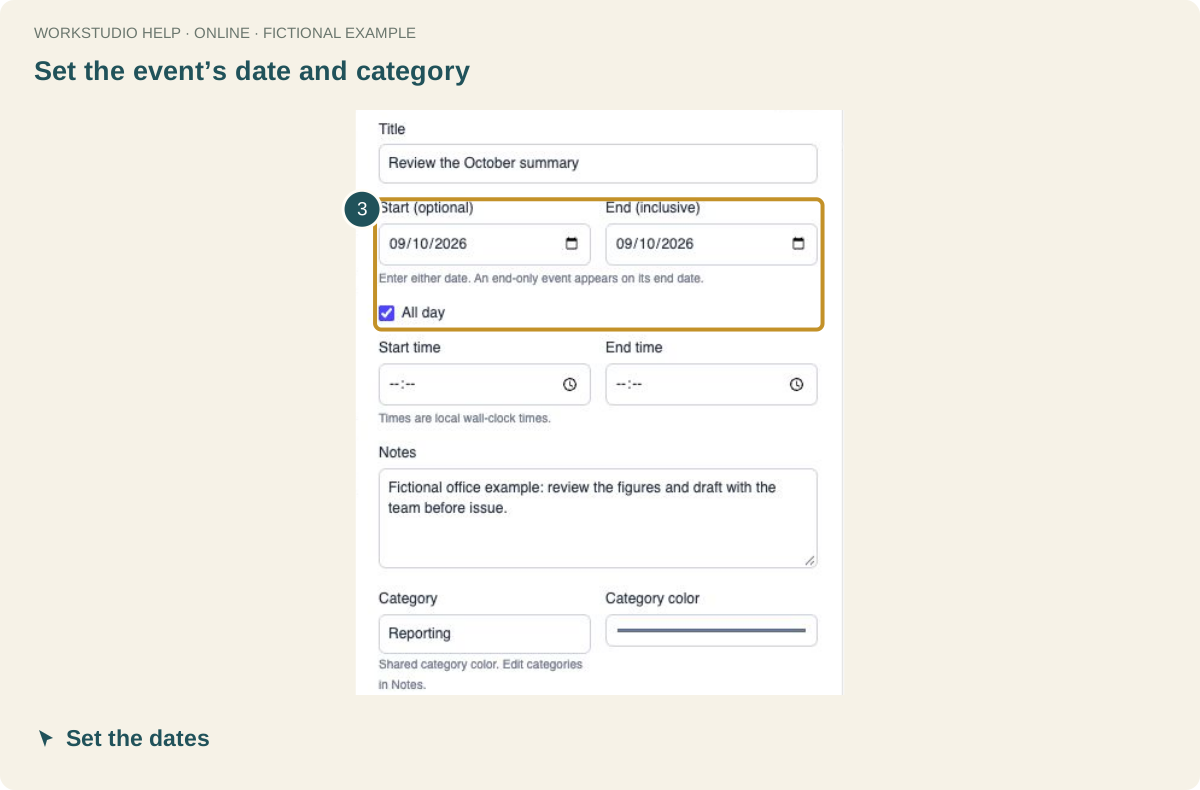
Enter the title and start/end dates. Choose All day when no time is needed, and add the Reporting category. Scroll down and click Save event.
Check Week view
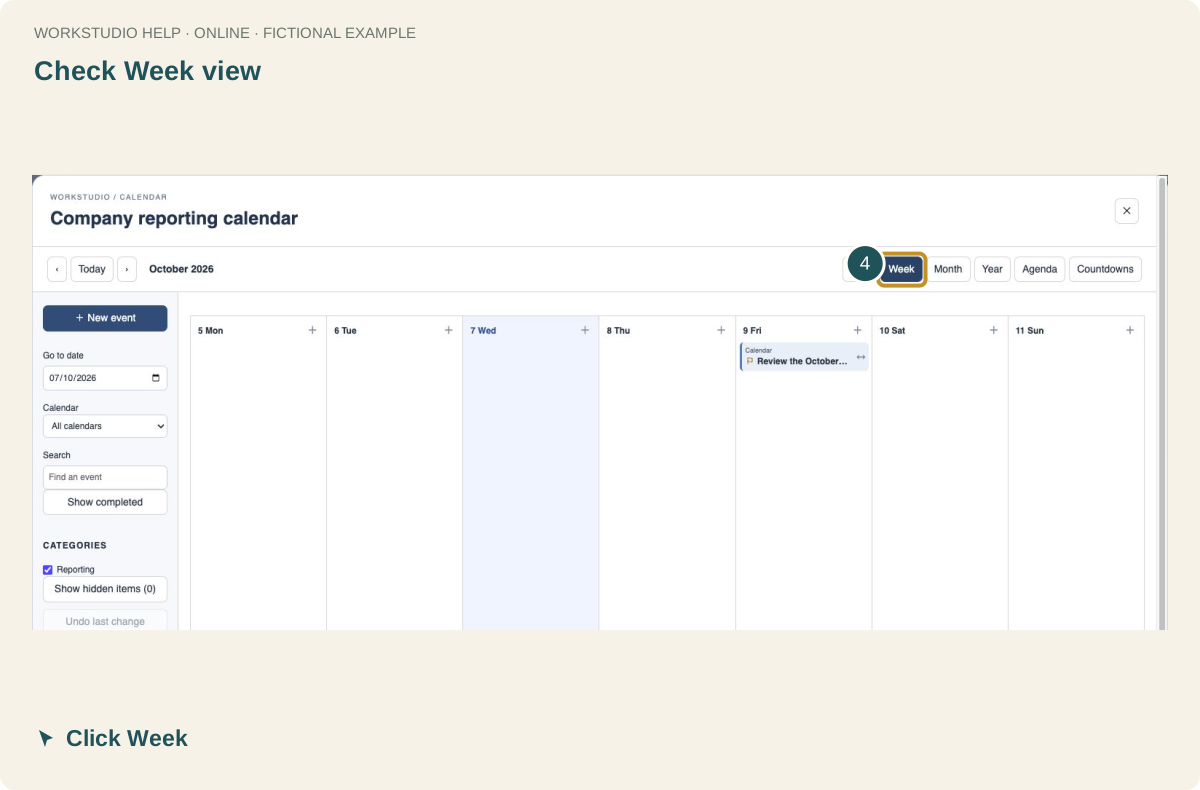
Click Week. The review appears on Friday 9 October. Check the date range before moving to another week.
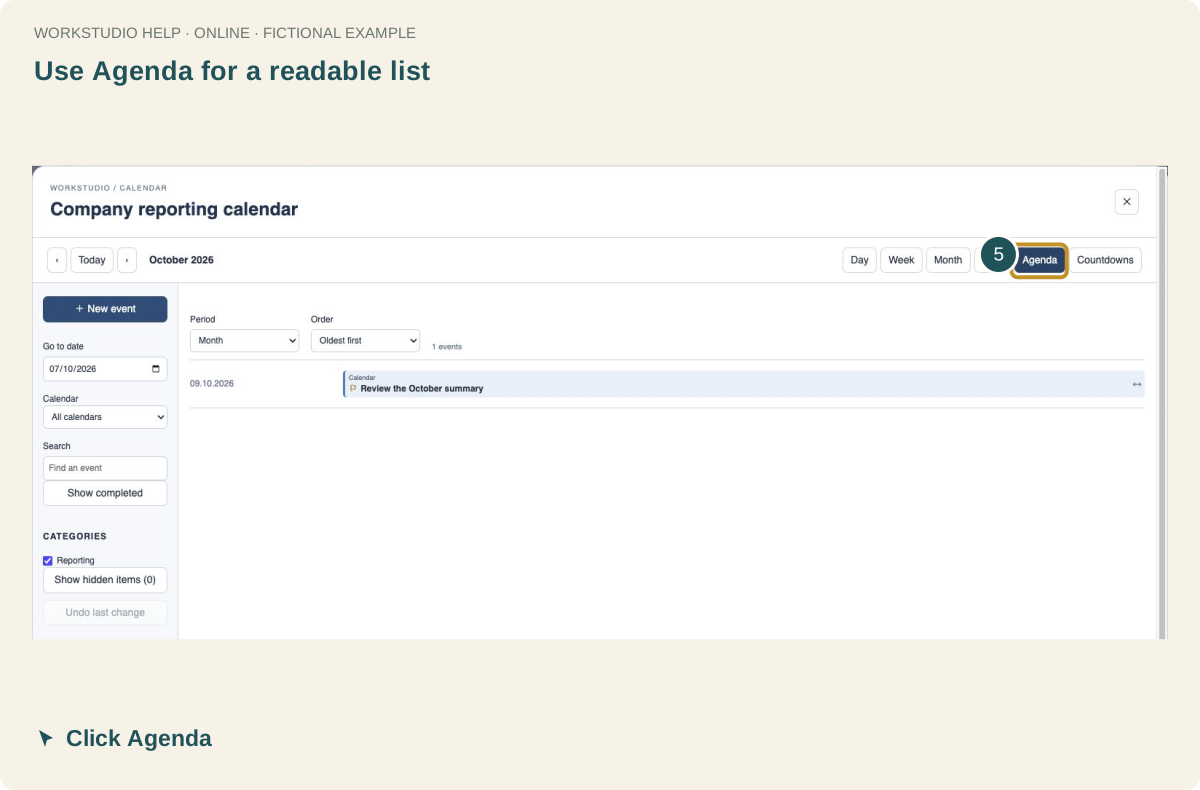
Use Agenda for a readable list
Click Agenda. Select a period and search or filter if needed. Show completed affects visibility; it does not undo completion.
Save the Catalog
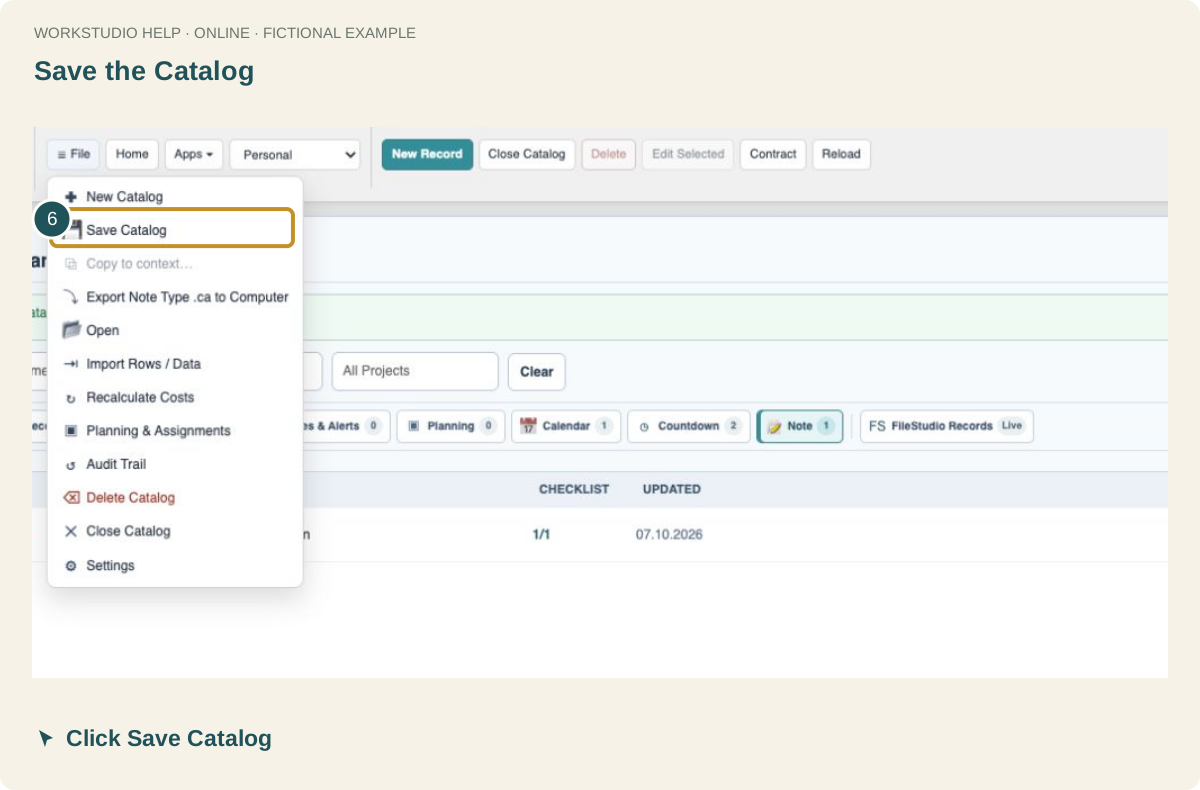
After finishing your event changes, close Calendar and the record, then choose File → Save Catalog.
Enable JavaScript to use reading progress and usefulness ratings.